My First Hackintosh
A year ago I wrote about how I wanted to build a Hackintosh. Oddly enough, exactly a year later, I ended up getting around to it.
My roommate/cofounder Akshay had a Gigabyte GA-EP35-DS3R motherboard and Core 2 Quad CPU lying around from his last hackintosh (he's since upgrade to Sandy Bridge). I ended up putting getting a display, graphics card, case, SSD and PSU to put it to use. I plan on upgrading to the new Ivy Bridge chipset and 22nm CPU but will wait until Apple releases an Ivy Bridge computer so that no patched kernel hacks are necessary to get it working as is currently the case.
So far I'm very happy with my current setup. Even though it's an old LGA775 setup it feels way faster than my Core i7 1.8GHz MacBook Air. The Hackintosh has a 2.4GHz Core 2 Quad that I overclocked a bit to 3GHz.
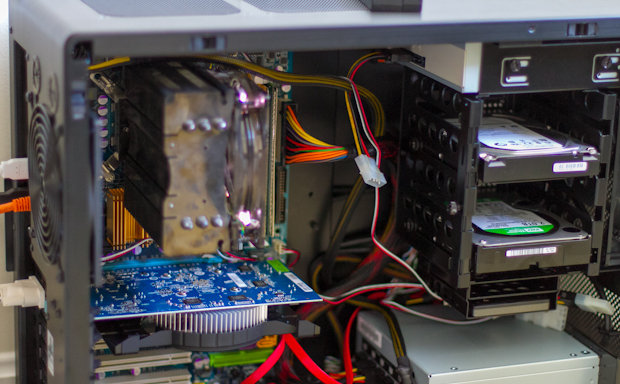
Current Specs: Intel Q6600 2.4GHz Core 2 Quad @ 3GHz, 4GB DDR2 800, Gigabyte GA-EP35-DS3R motherboard, Gigabyte Radeon HD6670 graphics card, Antec 520W modular PSU, Lian Li PC-V700 case, Kingston HyperX 3K 120GB SSD, 2 x 2TB hard drives, Lite-on SATA DVD drive.
I'm the most pleased with the Lian Li case. It's their smallest ATX offering and comes with lots of rubber standoffs to ensure quiet operation. The doors don't need any screws and they just snap on and off. The most interesting part is that the PSU is located in the front of the computer, so as to reduce the height of the case. It reminds me of when people were talking about the BTX form factor back in ~2004 and all the BTX cases relocated power to the bottom.
Process
I'll go into more depth about how the whole Hackintosh installation process works when I upgrade this box to Ivy Bridge later in the summer, but here's the gist:- Create a bootable USB stick with a copy of OS X Lion you have purchased from the Mac App Store or from Apple's USB stick. Read: UniBeast: Install Mac OS X Lion Using an All-In-One Bootable USB Drive
- The guide linked to above covers everything, but essentially you install OS X then run a program called MultiBeast to install all the kernel extensions required to make your hardware work (things like network and audio drivers) as well as install a bootloader. I went the route of using "EasyBeast" which doesn't require a DSDT (which I'll explain in my next hackintosh post).
- After the OS X install I then downloaded OS X 10.7.4 combo update, ran it, then ran MultiBeast again (in general you run this app after every large system update).
- I couldn't get App Store working and got an account not verified working, so I had to download an application called EFI Studio and follow these instructions.
- I could not get audio working on this motherboard but fortunately I have been using a USB DAC for my headphones so I just plugged that in.
The best part? Using Adobe Lightroom 4 is no longer painfully slow.