![]()
I recently heard about a new webmail client from my friend Justin, who's infatuated with it. RoundCube, a "browser-based multilingual IMAP client with an application-like user interface," is the latest and greatest webmail client. It's only in the alpha stage of development, which explains the jagged installation procedures, but that doesn't mean it can't kick some major squirrels. RoundCube is much smaller, scalable, and less resource intensive than another competitor, Zimbra, which weighs in at 150 megabytes. The interface is the stunning with lots of AJAX magic as well as user configurable via XHTML and CSS 2 skinning. I love RoundCube so much, I'm declaring it better than Gmail. Yes, you read that correctly. Hopefully by the end of this article you will have a fully functioning RoundCube webmail client on your server.
Why You Want To Install It
Take a look at some of the screenshots. It's just as great as it looks once its on your server. I recommend you start with a RoundCube Demo. Please keep in mind the demo is heavily used and will be slow. It will be much faster on your own server. It's got lots of the new-fangled web programming language-hybrid, AJAX, which is an acronym for Asynchronous Javascript And XML. A strong feature that AJAX totes is being able to send and receive little bits and pieces of data without having to reload the page, making for clean page transitions in RoundCube. Also the AJAX in RoundCube makes a nice floating, translucent banner on the top of the page when it is loading or has an error to display. Check out this article on Adaptive Path if you want to find out more about AJAX. Still not blown away by RoundCube? Check out Mark Boulton's review.
Before we begin the installation there are some things you are going to need.
- PHP and MySQL support on your server
- An FTP client or some other way of uploading files to your server
- Access to a terminal or command line application if you want the latest CVS build of RoundCube
Installation
I will show you how to install the CVS build of RoundCube. However, if you would like a simpler way to get the files, go to this page on RoundCube and download the latest release. If you are willing to continue with the CVS download, open up a terminal. Copy and paste the following command into your terminal.
cvs -z3 -d:pserver:anonymous@roundcube.cvs.sourceforge.net:/cvsroot/roundcubemail co -P roundcubemail
This will automatically download the latest CVS build of the "roundcubemail" folder to your home directory. If you look inside of these folders you will see that CVS has put many files and directories all over the place (I counted 46) to keep track of things. This really just makes it slower for you to upload to your server, so you may consider deleting those before you upload it. For those of you that downloaded the tar.gz version, unzip that in your favorite decompression utility or use the terminal command tar xzf [roundcube].tar.gz
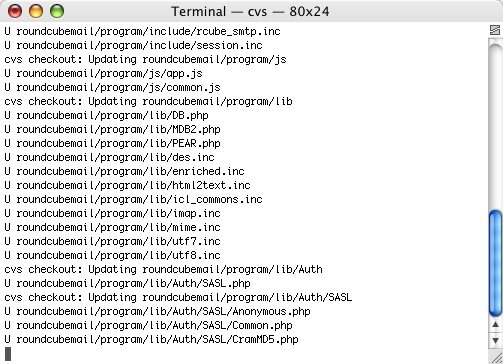
The CVS command doing its thing.
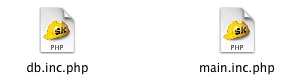
Open up the roundcubemail folder and navigate to the config folder. In here you will find two files, db.inc.php.dist and main.inc.php.dist. Rename both of them to remove .dist. You now have db.inc.php and main.inc.php.
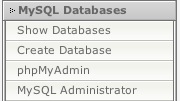
Before we proceed, you are going to have to edit a few things in these two files. First, you need to login to your web host's control panel so that you can create the new MySQL database that RoundCube requires. This varies greatly between hosting services, so I cannot go into too much detail. However, for Media Temple shared server customers you log into accountcenter.mediatemple.net and click on MySQL Databases in the left sidepanel and then Create Databases. Keep your browser open to this page as we are going to use it again.
In the dialog that loads, type in the name of the database you would like to use for RoundCube. Once you've completed that make sure to copy the full name of the database. Most web hosts, especially on shared servers, prepend your websites name to the database name. The login and password for the MySQL database will usually be the same one you used to log into the control panel with. If not, you can contact your hosting provider and they will gladly give you that piece of information. You should probably check the emails you received when you purchased the hosting first.
Now we can begin editing the configuration files. Open db.inc.php in a text editor. The only thing we are concerned about right now is giving RoundCube a way to access our newly created database. It's going to need to know your login information. Find the line that says
rcmail_config['db_dsnw']='mysql:// roundcube:pass@localhost/roundcubemail';
You are going to replace the part that says roundcube with your database login and pass with the database password. The localhost should remain the same on most configurations. The last thing to change is roundcubemail by replacing it with your database's full name. That's all we need to edit in this file, so now we can save and close it.
Open main.inc.php in a text editor and change the items below to the values I have listed. We will be adding a value to default_host so that we don't have to type it into RoundCube everytime we want to access email. It will just use localhost as the default. The session time is 10 minutes by default, but I like keeping it at 30 minutes. I've noticed that if you write an email and try to send it after those 10 minutes it will go back to the login page and lose your email; probably a small bug for now. The next two just change the way the dates are display and is more of a preference than anything else; it's not necessary. Visit this page on php.net to see the parameters for setting up the date formats. The next part with useragent also isn't necessary but it makes me happy. And then the last thing to edit is your timezone. I put -5 as I currently reside on the East Coast, so it depends where you live.
// the mail host chosen to perform the log-in
// leave blank to show a textbox at login, give a list of hosts
// to display a pulldown menu or set one host as string.
// To use SSL connection, enter ssl://hostname:993
rcmail_config['default_host'] = 'localhost';
// session lifetime in minutes
rcmail_config['session_lifetime'] = 30;
// use this format for short date display
rcmail_config['date_short'] = 'l g:i A';
// use this format for detailed date/time formatting
rcmail_config['date_long'] = 'm/d/Y g:i A';
// add this user-agent to message headers when sending
rcmail_config['useragent'] = 'RoundCube Webmail';
// use this timezone to display date/time
rcmail_config['timezone'] = -5;
Save the file and exit your text editor. Now that we are done configuring some things, you can upload the roundcubemail folder to your webserver. There are a few things to note. You are able to rename the folder to anything you likely without affecting the operation of RoundCube, which is nice to know because typing www.myurl.com/roundcubemail can get annoying. Renaming it to something like mail should be just fine. Fire up your FTP program and upload the folder to the root of your html directory. Note for (mt) customers: If you put your folder in the root of the html directory and name it mail.yoursite.com, roundcube will be accessible via that sub-domain; http://mail.yoursite.com. You can read up on creating a sub-domain on (mt)'s Knowledge Base.
After the upload has completed, use your FTP program to chmod the temp and logs directories to 777. This is generally done by right clicking on the directory and then selecting info, edit or chmod. You can also chmod them with chmod -R 777 [dir] via command line if you are so inclined.
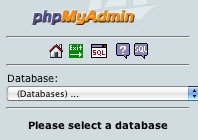
You're one step away from playing around with RoundCube. You need to create the tables required by RoundCube in your database. Go back into that open brower you had on the control panel page of your web host and look for a phpMyAdmin link. PhpMyAdmin is a fantastic MySQL database management tool and is pretty much the industry standard. For Media Temple customers, you can find phpMyAdmin under MySQL Databases. When you find the link, click it and log into phpMyAdmin. There will be a dropdown menu on the left pane; click on it and select your RoundCube database.
Then, click on the SQL tab. There will be an empty box labeled Run SQL query/queries on database. In this box you are going to paste the contents of the mysql.initial.sql file located in the roundcube folder within the SQL folder.
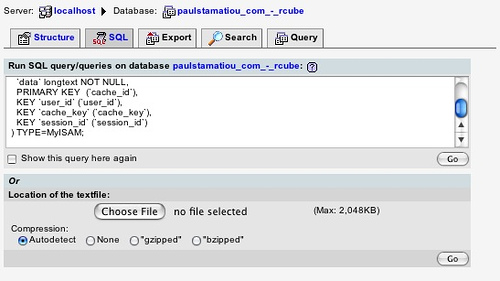
Once that has been pasted, click the Go button.
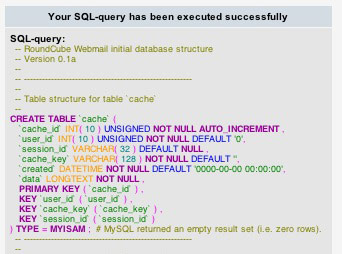
This is what you should get.
RoundCube cannot create new email users, that is done by your host. If you do not like the default email address given to you, as in it has your full name and you just want to use your first name (as was the case with me), go back to your web host's control panel. Look for a link to adding a user. Most of the time just adding a user gives that user an email address as well. If you're using Media Temple, expand Email/Users and then click on Add User. Fill out information on that page and click save. Your email login information should be the name of the user you just created and the password will be the same as the what you used to login to the control panel.

Moment of Truth
You should now be able to access your RoundCube installation by pointing your browser to the directory where you placed your roundcube folder. Once the page has loaded, login and don't forget to append your domain to the end of your login name. For example, your login will be yourname@yourdomain.com.
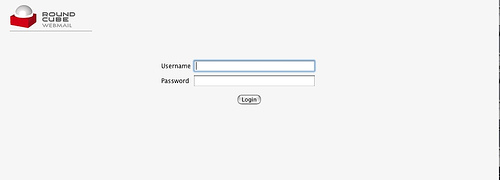
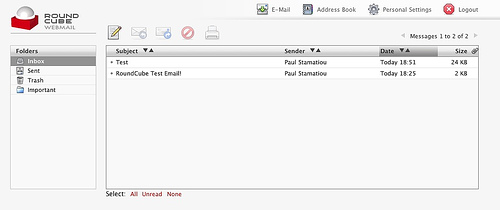
You should be greeted by a page like this.
RoundCube Tweaks
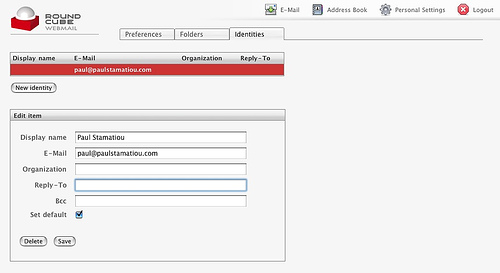
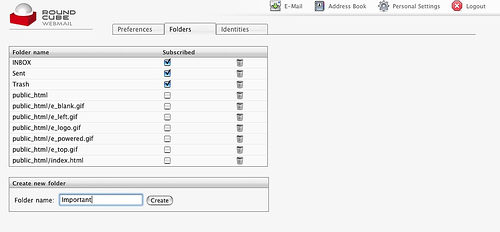
Click on Personal Settings, then the Identities tab. Double-click on the email entry it has for you and add your name as well as any other info you wish to provide and save. From there you may click New Identity if you wish to send emails that appear to be from one of your other email addresses. Click on the Folders tab and create any folders you want to organize your emails. Also, make sure RoundCube has the proper time zone in the Preferences tab.
Before you go, we need to test RoundCube. Send an email to your RoundCube managed email address from another email account and try to send one from RoundCube.
Everything should work fine, unless your web host has PHP Safe Mode enabled which means that PHP's mail() function may not, uh, function. Don't worry, there's a good alternative. Instead of using PHP to send your email you can route it through an external smtp service, which is only marginally slower than PHP mail(). Open your main.inc.php in a text editor and look for the following entries:
// use this host for sending mails.
// if left blank, the PHP mail() function is used
rcmail_config['smtp_server'] = '';
// SMTP username (if required) if you use %u as the username RoundCube
// will use the current username for login
rcmail_config['smtp_user'] = '';
// SMTP password (if required) if you use %p as the password RoundCube
// will use the current user's password for login
rcmail_config['smtp_pass'] = '';
// SMTP AUTH type (DIGEST-MD5, CRAM-MD5, LOGIN, PLAIN or empty to use
// best server supported one)
rcmail_config['smtp_auth_type'] = '';
You should contact your web host to find out the information for the first entry, smtp_server, but I just used localhost and it worked fine. Update: Media Temple just responded to my inquiry, and the real location is mail.paulstamatiou.com, so for other (mt) customers it should be the same format. The next two entries are likely going to be the same as the login/password you used to get into the web host's control panel, so you can enter in %u and %p respectively. The last entry is usually best left alone, unless your web host says otherwise. Once you fill that information in and save the file, hopefully RoundCube will be happy.
Now that you have the time and ability to play around with RoundCube, I suggest getting to know the Address Book. Currently, it is very simple but will soon be able to store and receive contacts in the popular vCard format and keep track of more information than just their name and email address. I like it better than Gmail, which automatically adds people to your contacts if you send them an email once. Keep in mind that this is an Alpha release, promising you much more in the future. Visit RoundCube often to keep tabs on newer versions and the roadmap to see what's in store for the future of RoundCube. When a new version is released simply download it and overwrite all files in your roundcube folder except the config files. Make sure that the temp and logs directories are still chmod 777. Don't take me for granted on that, you might have to keep the temp files as well. I'll probably update this article when a new version of RoundCube comes out and I get the change to upgrade my installation.
CSS Modifications
Navigate to skins>default within your roundcube folder. This directory contains all of the images and CSS files that determine how RoundCube's GUI looks. There are way too many things that could be edited to cover, so I'll just get you started. Open up mail.css and look for #messagelist tr.selected td. The attribute background-color is responsible for the color of a selected email. By default it is a deep red #CC3333, however, I prefer blue over red so I put in a value of #3388CC. Save that and then open up common.css and add the same color value, #3388CC, to background-color for table.records-table tr.selected td and #rcmKSearchpane ul li.selected. I also decided to change the "loading" message to blue from gray. I changed background-color in #message div.loading to a light blue, #AFD7F8, and border to #3388CC. Save again.
If you want to change the color of something in particular, find out what the hex code for that color is likely going to be (e.g., a dark gray would likely be #333333) and then search for it. Once you find it, replace it with the color you want. If you don't know what you are doing, you shouldn't really be playing around in the CSS files. For example, if you want to keep the original color commented out but you use only //, RoundCube won't load properly. The correct way to comment out would be using /* */. The CSS files for RoundCube are lengthy and complex, so trial and error alone would take time. That being said, I'll try to update this once I've hacked around with the CSS some more.
I decided to brand my installation of RoundCube while I was in the customizing the CSS. By branding I mean changing the RoundCube logo image to something that pertains more to you. I opened up the roundcube_logo.gif in skins/default/images/ in my beloved Photoshop CS2. You can do the same thing. Edit the logo however you like and save it in gif, png, and a grayscale gif for the print CSS.
I also personalized the log out message. If you would like to do the same or edit any other messages, find the messages.inc file in /program/localization/en/. Edit the messages['loggedout'] entry as you please and then save. Mine now reads You have successfully logged out of PaulStamatiou.com. Good bye!
Fini
I hope you learned as much about RoundCube in this article as I did while writing it. The first time I touched RoundCube was today, so all this is new to me too. I really do believe that RoundCube has some massive potential. Given an active developer community on SourceForge, I expect RoundCube will be up-to-speed with competiting webmail applications shortly. It blows the doors off of the industry standard, SquirrelMail, which has a hideous user interface. If you enjoyed this article, please contact me. I love hearing from my readers. I'm always open to suggestions for review or how-to articles. If you should have any further RoundCube questions, the RoundCube forum is an excellent resource.
Here's an adaptation of my article for setting up RoundCube on FreeBSD.